Results, Reports, and Testimonials
Comparison of SCRATCH Tests
DutyKote/Monster Tough VS Cerakote
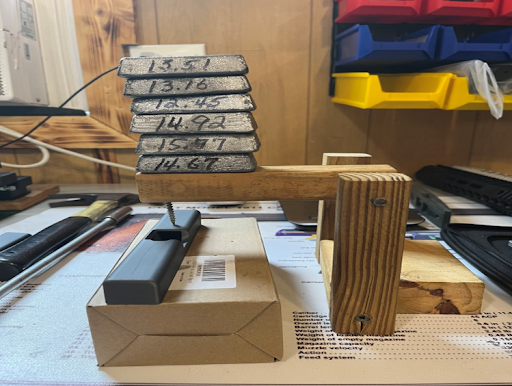
These elementary tests were conducted using a simple scratch application
device, (refer to included pictures) at different stages in the curing process
without the use of an oven for DutyKote/Monster Tough (air cure). The Cerakote
(oven cure) results using the same device were documented after the curing
process was complete (more than 1 week) and using an oven.
Cerakote
Cured over 1 week after using an oven:
15.77 oz. = 15.77 oz. No evidence detected
14.92 oz. = 30.69 oz. No evidence detected
12.45 oz. = 43.14 oz. Scratches that won’t rub off
14.67 oz. = 57.81 oz. Scratches that won’t rub off
13.16 oz. = 70.97 oz. Scratches that won’t rub off
13.51 oz. = 84.48 oz. Scratches that won’t rub off
DutyKote/Monster Tough
Cured 1 day w/o the use of an oven
15.77 oz. = 15.77 oz. No evidence detected
14.92 oz. = 30.69 oz. No evidence detected
12.45 oz. = 43.14 oz. No evidence detected
14.67 oz. = 57.81 oz. Scratches that won’t rub off
13.16 oz. = 70.97 oz. Scratches that won’t rub off
13.51 oz. = 84.48 oz. Scratches that won’t rub off
DutyKote/Monster Tough
Cured 5 days w/o the use of an oven
15.77 oz. = 15.77 oz. No evidence detected
14.92 oz. = 30.69 oz. No evidence detected
12.45 oz. = 43.14 oz. No evidence detected
14.67 oz. = 57.81 oz. No evidence detected
13.16 oz. = 70.97 oz. Scratches that won’t rub off
13.51 oz. = 84.48 oz. Scratches that won’t rub off
After each test piece had cured for a period of 1 week and without the use of an
oven, it took 4.34 lbs. of dead weight to create scratches that will not rub off, on
the DutyKote/Monster Tough example. Comparatively, after the Cerakote example
had cured for a period of more than 1 week and after oven curing it only takes
2.69 lbs. of dead weight to create scratches that will not rub off.
While this testing was rather elementary and un-scientific in nature, I think it
adequately demonstrates the several advantages with the use of DutyKote
(Monster Tough). It should also be noted that while we have had a substantial
amount of Cerakote work done at the current facility we have been using for well
over a year and with satisfactory results, to my knowledge the techs at that
facility have not had formal Cerakote training.
Our conclusion and position on DutyKote (Monster Tough) is that it is clearly a
much more durable coating, and the process is much simpler and easier to apply,
not requiring the use of an oven or the need to be mixed with a catalyst.
Additionally, the DutyKote (Monster Tough) process cuts down on the amount of
application time and effort, product waste, equipment clean up time, and a much
shorter learning curve in order to become proficient with the products.
Except in very rare cases, we have discovered that we do not require the use of
Acetone to prep prior to painting. If you have ever had to use Acetone you
already know how nasty that stuff can be.
Sidewinder Enterprises LLC
Geneva, Fl.
About our business – We have constructed a state of the art paint room at our
manufacturing facility here in Geneva, Fl. Including a top of the line blast cabinet, clean
compressed air supply, ventilated spray booth, paint gun cleaning station, oven, and a
fridge for storing our paint and other liquid supplies. The sealed paint room is
temperature controlled and filtered for fresh clean air.
This is amazing data! From this, we can infer that at half the coating thickness of Cerakote, DutyKote has twice the strength and durability! The thought process displayed in this setup is pretty brilliant in its simplicity.
Jake – Green Mountain Frontier

DutyKote, A New Refinement of Firearms Coating
Ammoland Inc. Posted on June 8, 2022 by Jens “Rex Nanorum” Hammer
DutyKote, A New Refinement of Firearms Coating Photo courtesy of Matthew Komar.
U.S.A. –-(AmmoLand.com)- I recently got word through the grapevine that there was a new competitor in the world of firearms coatings. The new product is called DutyKote and aims to rectify many of the perceived negatives of Cerakote and similar coatings. How does DutyKote’s Monster Tough line look to manage this feat? Read on.
DutyKote differs from Cerakote in a few ways. Here are the highlights:
- Air cure, no oven needed.
- Single product, no mixing two products.
- Less coverage is needed. Monster Tough products should be applied between .4 mils and 1 mil thick, compared to 2-3 mils thick for Cerakote.
- Less waste. Unused DutyKote can be returned to the container, unlike mixed Cerakote which is wasted.
- Food Safe. If you want to eat a fried egg off of your suppressor, DutyKote advertises “Polysilazane cured resin is FDA compliant for food contact surfaces”.
- “When fully cured, it is UV resistant, significantly more durable, tougher, and more chemical and wear-resistant than heat cure coatings. It will hold up to extreme heat and will not burn off like other coatings (including as an exterior coating on suppressors).”
DutyKote offers a few different types of firearms coatings; here’s a primer on their different lines.
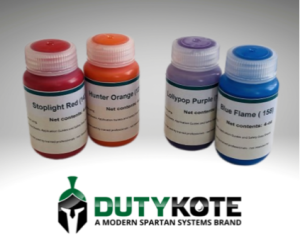
- Monster Tough: The flagship line of paints, available in 32 colors.
- Super Prime: An ultra-adhesive primer that can be wiped on.
- Wet Grip: Similar to True Grip, but without extra grit added.
- Starter Kits: Three kits that come prepackaged with 3x colors, True Grip, Super Prime. USA, LEO, Military themes available.
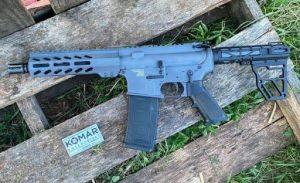
Photo courtesy of Matthew Komar.
DutyKote is definitely more expensive than Cerakote. Cerakote runs about $35/4 oz, while Moster Tough runs $90/4 oz. Will a thinner application layer and reduced waste from excess mix close the gap?
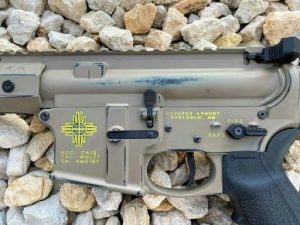
“Battle worn” finished Duty Kote. Photo courtesy of Dustin Farnsworth.
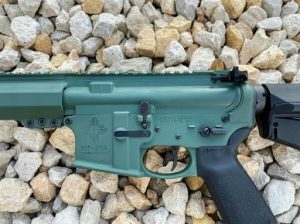
Clean jacket of Duty Kote. Photo courtesy of Dustin Farnsworth.
Marketing hype is good and well, but hands-on experience is the ace in the hole. I’ll be taking the Military Starter Kit over to my local FFL, who is a highly experienced Cerakote applicator, in order to coat some parts and get his comparison. Stay Tuned!
Thanks to Matthew Komar (of Komar Enterprises and Ghostwriter software for the Ghost Gunner CNC) and Dustin Farnsworth (of Caverns Armory in Carlsbad, NM) who were kind enough to donate a couple pictures for this article.
About Rex Nanorum
Rex Nanorum is an Alaskan Expatriate living in Oregon with his wife and kids. Growing up on commercial fishing vessels, he found his next adventure with the 2nd Bn, 75th Ranger Regt. After 5 tours to Afghanistan and Iraq, he adventured about the west coast becoming a commercial fishery and salvage SCUBA diver, rated helicopter pilot instructor (CFII) and personal trainer, before becoming a gear reviewer and writer.”

Jeff Hendricks heard about the DutyKote brand, did his homework, invested in some product, and now loves it enough to invest in more. His work is excellent and getting better!
Here is his write-up, review, and advice!
The Baseline
I have historically used a pretty well-known, two-part coating system for my firearms. Although that product worked pretty well, there was extra effort involved in getting the product ready and there was always waste. When using any two-part coating, you have to mix enough to be sure you will get through the project without running out. As a result, when you are complete, the “left-overs” must be thrown in the garbage. That is expensive! Also, I just had to throw away several bottles of hardener/catalyst, because the shelf-life is not great.
The Project
I have a Springfield XDS which I carry while doing work around my property, because of its
slim formfactor, it doesn’t get in the way. That pistol had been worn down to the bare metal due to the dirty environment in which it is typically carried. Extraction from and insertion into the holster out there is much like sanding the firearm. So, it was a great choice to try Monster Tough on.
The Product
This was my first run with Monster Tough, and once I got the hang of it (lessons learned coming up), it went really well. As mentioned earlier, I have historically used two-part coating systems for protecting my firearms. Monster Tough was AWESOME in this regard. After properly prepping the parts (sorry for all of the “Ps”), you thoroughly mix Monster Tough and put it in your spray device of choice. After coating your parts, you can pour the extra product right back in your bottle!! There is practically no waste! When I got everything adjusted, the product sprayed very easily. This product goes on VERY thin, so where you may have used an ounce of product from other systems on a firearm, you can use only about 0.25 of an ounce with Monster Tough. The product seemed to “flash” off relatively quickly, considering it was pretty cool when I applied it. That means that you can handle the part(s) more quickly than with some other products… especially in a cooler environment.
Speaking of temperature… you do NOT need to bake this product! So, let me spell this part
out. One two-part system that I have used before, which does not require baking, takes 6-weeks to fully cure. That does not mean you can’t handle and/or use the part(s) within 6 weeks, but for full durability, it takes that long. Monster Tough was hard as a rock in less than a week with no baking. Another two-part system which does require baking… requires baking. So, after your part(s) is/are coated, you have to bake everything at pretty high temps for a fair amount of time. If you don’t get a dedicated oven, your wife will love you a little less. If you do get a dedicated oven, you have to spend the money, dedicate the space, and get the wiring done to run it. That can be a show-stopper. With Monster Tough, you don’t need 6 weeks OR a dedicated (if you love your wife) oven to achieve full cure in a reasonable amount of time.
Since this is my first run of Monster Tough, I can tell you that the initial evaluation is that it is hard as a rock. Long term durability is still TBD. I just don’t have the time with the product on my weapon to comment on it.
Lessons Learned
Coverage – Your standard airbrush is NOT the way you want to apply this product for an all- over job. If you are doing detailed work, like Krypton patterns on a pistol or shading work would be great for the airbrush. It just takes too long to cover your project with an airbrush. I used a 0.05 needle/tip, and it worked out well. If you are doing an all-over job, a detail/touch-up HVLP gun works better. ADJUST your air pressure and paint flow! When I transitioned from the airbrush (first coat) to the touch-up gun (second coat), I did not turn down my air and paint enough, and WAY more product went down on the second coat. This was totally my fault… no issue with the product at all. I readjusted the touch-up gun for the third coat/color, and it went on MUCH better.
Multi-Coat Work – If you are not doing wet-on-wet coats (fresh product on top of uncured
product), it is recommended to use Super Primer to help the new layer of Monster Tough stick to the cured Monster Tough. This is what I did, since I was using stencils. I wanted the initial product to be pretty hard before I handled the parts to apply stencils. You have a fairly small window of time to spray the Monster Tough over the Super Primer, so I personally recommend using two spray guns. Hit the part(s) with the Super Primer spray gun, disconnect the air, connect the air to the Monster Tough spray gun, and get moving. (Because you need only 3-4 microns of Primer on the surface to activate it, a spay gun may apply too much product and cause problems. Using a microfiber cloth to wipe on the Primer (giving you a 10-15 minute window), may work better, and be less total work).
Side note: I highly recommend using the high-temp vinyl (yellow) stencils if you are going to use stencils. They are relatively thin, very flexible, and much easier to use than other stencils I have tried.
The Procedure
Here is the procedure that I followed to complete this project.
• Complete disassembly
• Degreasing all parts with Carbon Destroyer from Modern Spartan Systems. It is a
water based, powerful cleaner degreaser that is non-toxic and can even remove Cosmoline.
• WEAR NITRILE GLOVES FOR ALL OPERATIONS, WHEN DIRECTLY HANDLING PARTS, BEYOND THIS POINT
• Rinse with hot water
• Blast all metal parts with 120-grit aluminum oxide at 30 PSI
• Blast all composite parts with 120-grit aluminum oxide at 15 PSI
• Blow off/out all parts with compressed air
• Wipe down all parts with Denatured Alcohol
• Sprayed Flat Dark Earth with airbrush (not recommended) all over
• Let cure for 24 hours
• Applied first layer of stencils
• Sprayed Super Primer
• Immediately sprayed Highland Green
• Let cure for 24 hours
• Applied second layer of stencils
• Sprayed Super Primer
• Immediately sprayed Foliage Green
• Let cure for 24 hours
• Removed Stencils
• Let cure for 5 days to get a 100% rock hard cure